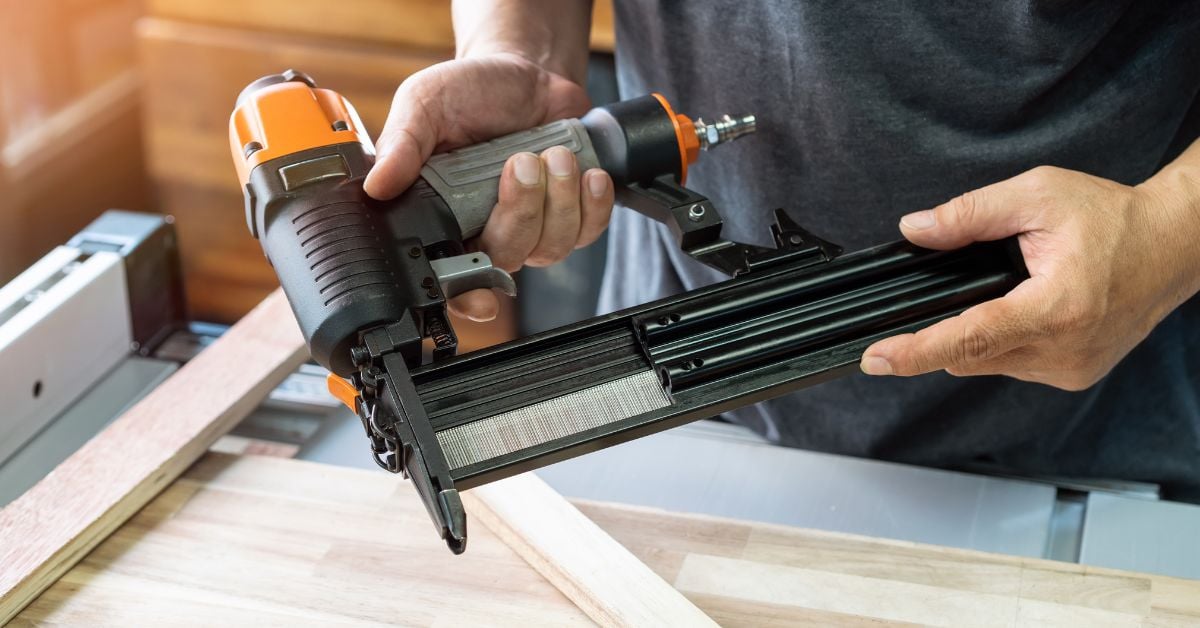
When you pick up a staple gun, you might think of tacking down carpets, securing wiring, or fastening lightweight materials. However, staple guns offer more versatility than meets the eye. Some models allow for brad nails, which opens new possibilities in woodworking, construction, and DIY projects!
Whether you’re securing trim, molding, or delicate woodwork, learning how to load brad nails in a staple gun allows you to get the most out of your tool. Discover the process for your next project.
Understanding Your Staple Gun
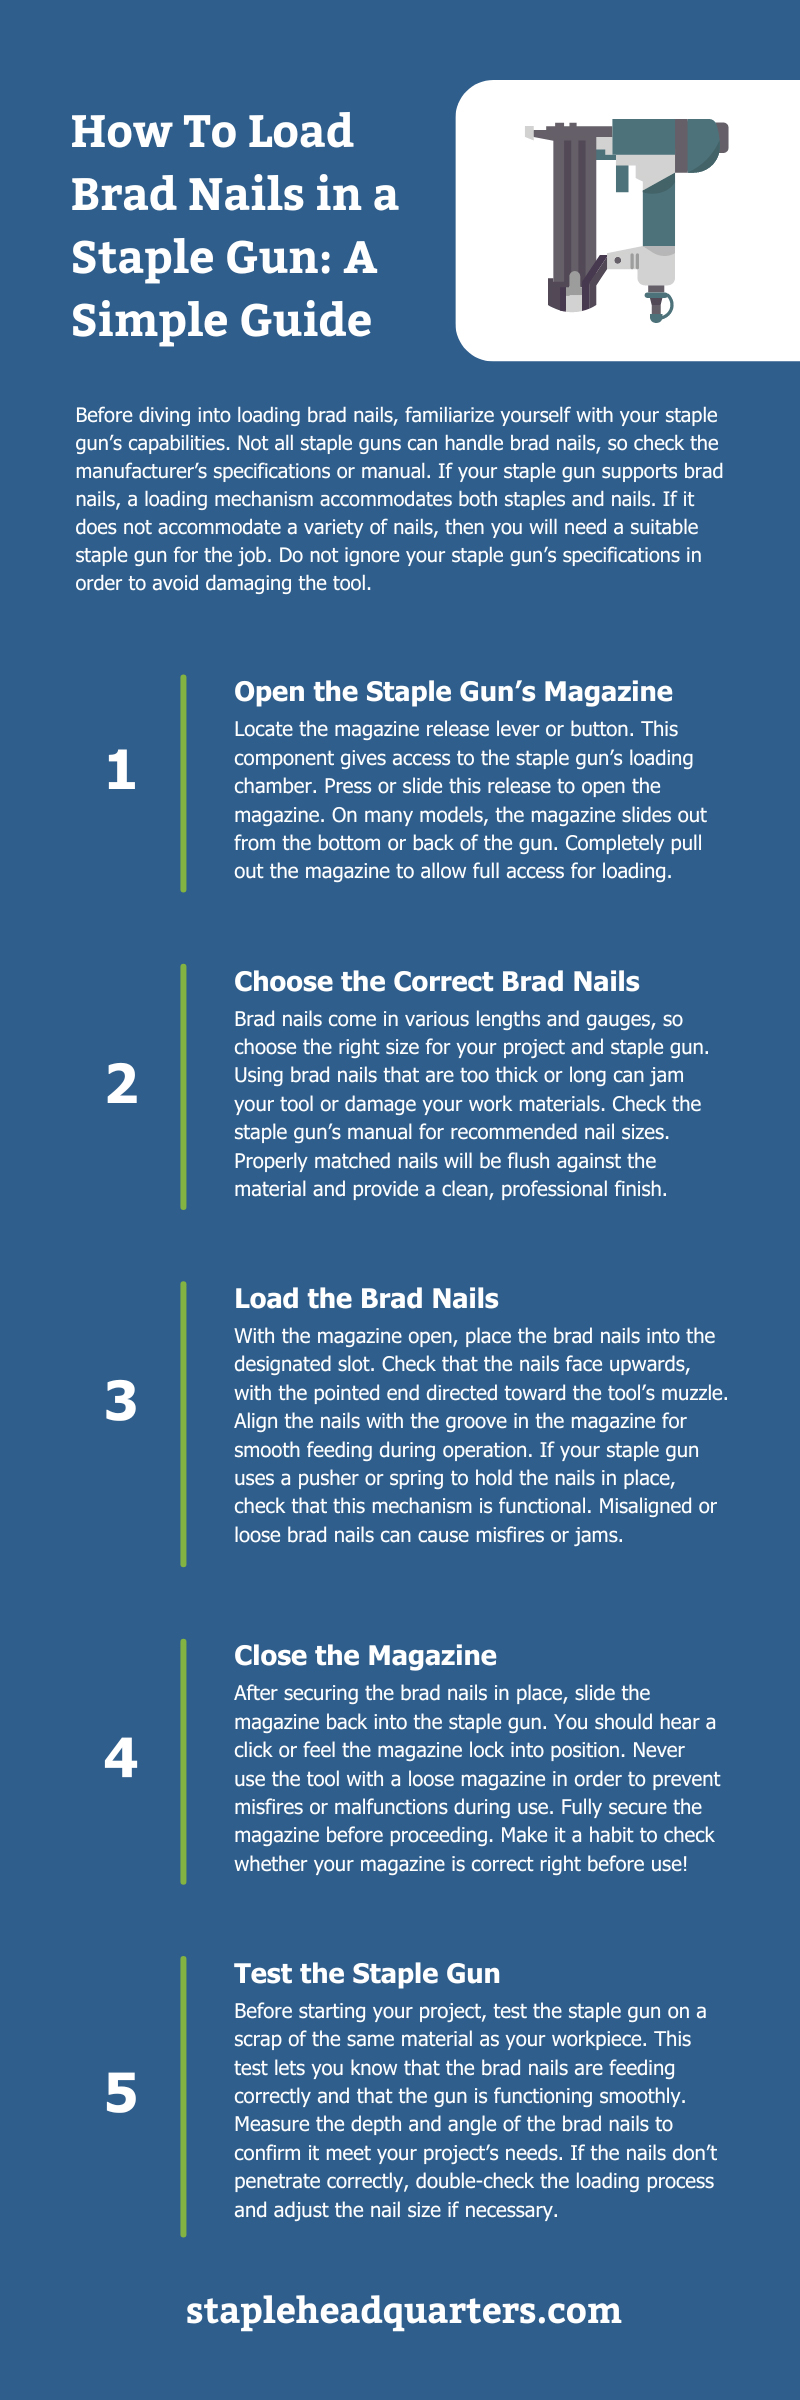
Before diving into loading brad nails, familiarize yourself with your staple gun’s capabilities. Not all staple guns can handle brad nails, so check the manufacturer’s specifications or manual. If your staple gun supports brad nails, a loading mechanism accommodates both staples and nails. If it does not accommodate a variety of nails, then you will need a suitable staple gun for the job. Do not ignore your staple gun’s specifications in order to avoid damaging the tool.
Safety First
Always prioritize safety when working with a fastening tool. Unplug the staple gun, or remove its battery if it’s a cordless model. Verify that you’ve locked the staple gun's handle to prevent accidental firing during the loading process. A well-lit and organized workspace further reduces the risk of injury, and wearing safety glasses protects your eyes from discharge and debris.
Step-by-Step Guide to Loading Brad Nails
After confirming compatibility, you can begin with loading the nails. These step-by-step instructions make starting off easy:
1. Open the Staple Gun’s Magazine
Locate the magazine release lever or button. This component gives access to the staple gun’s loading chamber. Press or slide this release to open the magazine. On many models, the magazine slides out from the bottom or back of the gun. Completely pull out the magazine to allow full access for loading.
2. Choose the Correct Brad Nails
Brad nails come in various lengths and gauges, so choose the right size for your project and staple gun. Using brad nails that are too thick or long can jam your tool or damage your work materials. Check the staple gun’s manual for recommended nail sizes. Properly matched nails will be flush against the material and provide a clean, professional finish.
3. Load the Brad Nails
With the magazine open, place the brad nails into the designated slot. Check that the nails face upwards, with the pointed end directed toward the tool’s muzzle. Align the nails with the groove in the magazine for smooth feeding during operation. If your staple gun uses a pusher or spring to hold the nails in place, check that this mechanism is functional. Misaligned or loose brad nails can cause misfires or jams.
4. Close the Magazine
After securing the brad nails in place, slide the magazine back into the staple gun. You should hear a click or feel the magazine lock into position. Never use the tool with a loose magazine in order to prevent misfires or malfunctions during use. Fully secure the magazine before proceeding. Make it a habit to check whether your magazine is correct right before use!
5. Test the Staple Gun
Before starting your project, test the staple gun on a scrap of the same material as your workpiece. This test lets you know that the brad nails are feeding correctly and that the gun is functioning smoothly. Measure the depth and angle of the brad nails to confirm it meet your project’s needs. If the nails don’t penetrate correctly, double-check the loading process and adjust the nail size if necessary.
Avoid Common Loading Issues
Even with preparation, issues can arise when loading brad nails in a staple gun. Understanding common problems and their solutions minimizes downtime and frustration.
Jamming Issues
If your staple gun jams during operation, stop immediately and unplug the tool. Open the magazine and carefully remove jammed brad nails. Then, inspect the magazine for damage or debris that might obstruct the nails’ path. Regularly clean your staple gun to prevent jams caused by dirt and residue buildup.
Misfiring
Misfires might occur if the brad nails aren’t aligned in the magazine. Double-check the placement of the nails before closing the magazine, and make sure that the spring or pusher mechanism is applying the correct pressure to feed the nails. If misfires continue, the tool might need servicing.
Nails Not Penetrating
If the brad nails fail to penetrate the material, the issue might stem from the nail size or the staple gun’s power settings. Use the correct nail length and gauge for the material. Some staple guns feature adjustable depth settings; tweak these settings until the nails penetrate correctly.
Enhancing Your Staple Gun’s Versatility
Knowing how to load different nails allows you to tackle a wider range of projects, from basic home repairs to intricate woodworking tasks. Switching between staples and brad nails offers greater flexibility, allowing you to select the best fastening option for each project.
Find the Right Tools and Accessories
You can find a wide range of brad nails and accessories for staple guns and achieve professional results by investing in the right tools. Visit a reliable stapler store, such as Salco Inc., for the best selection. Whether you need specific nail sizes, replacement parts, or additional accessories, Salco provides the expertise and products you need to get the job done right.
Maintenance Tips for Long-Term Use
To keep your staple gun in optimal condition, follow a regular maintenance routine. Clean the tool after each use to remove dust, debris, and residual adhesive from the brad nails. A clean tool is safer and more reliable than you think, plus it lasts long and performs efficiently!
Lubricate the moving parts according to the manufacturer’s recommendations for smooth operation. Also, regularly check for signs of wear or damage, especially in the magazine and trigger mechanisms.
Choose Salco for Your Staple Gun Needs
Salco is a leader in the staple and fastener industry, with a legacy of quality and customer satisfaction since 1947. We offer a diverse range of staple guns, brad nails, and accessories to meet the needs of both professionals and DIYers.